A Runners Pre-Run Warm Up

Running is a very cyclical sport, you run the same way for the duration of the event.  If you run long distances, you are maintaining the same form (hopefully!) for a long long time.  Even 3-5km is a long time to keep a runners position.  The pounding of the pavement (even grass) sends vibration of through your spine that can cause many runners to feel back pain.  The core muscles (deep in the pelvis) need to maintain your posture for a long period of time and can become fatigued.  This exhaustive state can cause break down and eventual injury.  

I’ve listed a few simple exercises that are great for a pre-run warm up but also as part of a weight lifting routine.  If you’re doing a general fitness workout, or Olympic workout, this routine can be mixed in before or after to help maintain your form and keep you injury free.

I have not listed stretching and dynamic warm ups, that will come in a following blog.

Image

1 leg glute bridge

The 1 leg glute bridge is great for activating the glutes (your butt).  You should be able to do this without getting a hamstring cramp or having your hamstring work harder than your glute.  If you can’t get your glute to work, only lift your hips a little bit off the floor.  If your glutes are firing nicely, lift your hips as high as they can.  You will repeat the up and down movement; start with 10 reps and work up to 15 or 20.  As a warm up, you might only need to do 1 set, as a workout do 3 or 4 sets.

Image

Glute bridge with hip abduction

With this glute bridge, keep your hips up the entire time.  Have the band tied just above your knees as tight as you can (without cutting off circulation).  Your knees will move in and out while keeping your pelvis absolutely still.  Start with 10 reps and move up to 15-20.  Again, as above, vary your sets for warm up versus workout.

Image

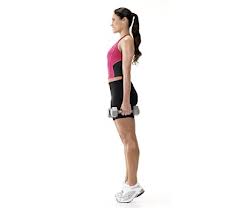
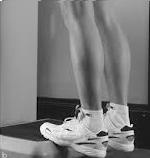
Side walking with band

Side walking with a band is a great functional warm up and exercise for glute activation.  Keep the band you had from the previous exercise and find a space about 12-15 feet long.  You will get yourself into a quarter squat and move sideways.  Once you get to the end, go back to where you started facing in the same direction. Make sure you don’t creep forwards or backwards.  You should feel your hips burning and working!

Hip swings are likely your best tool for loosening up your hips and back.  You can do this as part of a dynamic warm up, in line at the bank, part of a cool down, or doing your workout or run.  Try to relax as much as you can and swing your legs as high as you can. You can swing your legs forwards and backwards and side to side.  Do as many as you need to in order to warm up and get loose.  This is best shown in video format.

See the videos here! Click here

Stay tuned for more warm up and core tips coming soon.  The more you stay on top of keeping your glutes and core activated, the less chance of injury you have! 

Questions? Concerns? Please email me.

Jen Mark BSc., CAT(C), CSCS
Athletic therapist
dynamicliving.me

Shin Splints No More!

Image

Working with runners of all kinds, I see a lot of “shin splints”.  When I was a collegiate athlete, I had my share of shin problems, to say the least!  I had multiple stress fractures, tight calves, and strained muscles.  I had to bike, swim, and strengthen like crazy just to complete long runs!

Now that I have an athletic therapy background and some experience under my belt, I understand better how this can be prevented and treated before stress fractures and muscle tears occur.

What are “shin splints”:

Shin splits is a bit of a garbage term.  It can mean: muscle tears, tendonitis, fractures, compartment syndrome, or tightness.  Most people suffer from weak tibialis posterior or tibialis anterior muscles.  Calves are usually too tight and a muscle imbalance results.

The Simple Prevention: 

Running shoes are so important for high level athletes as well as recreational runners.  Having a fresh pair of shoes that are under 8 months old is likely the easiest prevention.  Shoes that work to keep you straight is an important investment.  If you tend to over-pronate, are a heavy runner, or do a lot of mileage, you need more motion control in your shoes.  If you have a high, rigid arch and are heavy on your heels, you need a more cushioned shoe.

Training Errors:

Increasing your mileage too quickly (taking the summer easy then ramping up for an indoor track season) when you’re not strong is the best way to get shin pain.  Mileage must be increased moderately and your base fitness should be maintained all year long.  This includes volume as well as intensity of the runs.  Another training error is not allowing enough recovery time.  As you build your mileage, allow for a recovery or drop back week.  Giving your nervous system some regeneration and soft tissue a chance to repair makes your harder weeks much more effective.

Strength:

Having the strength in your lower legs will help your legs not get so fatigued resulting in microtears – leading to injury.  Ankles need to be stable and not over reactive to ground forces.  Knees need to be strong (which comes from glute strength).  Runners tend to neglect their lower legs assuming that they get enough work from running.  You need resistance with the training so the forces working on the body with running are much less. See the exercises below on how to accomplish some specific strength.

Stretching:

After each run, ensuring that you are stretching your shins, calves, and the bottom of your foot is crucial.  A good 10 minute stretch routine post run is the bare minimum for proper recovery and injury prevention.

Solution:

Here is a short routine that can be done daily to maintain or build strength in your lower legs.

Image

1. Toe tapping 3 x 20 taps

Image

2. Walking on your heels while brushing your teeth

Image

3. Inversion with a band 3×12

Image

4. Eversion with a band 3×12

Image

5. Dorsiflexion with a band 3×12

This will help to build and prevent shin pain especially overuse injuries.  If you have been injured, seek treatment sooner rather than later.  Muscle tears are much harder to treat and will put you out of commission for 6-8 weeks.

Jen Mark BSc., CAT(C), CSCS
Athletic Therapist
www.dynamicliving.me
Join us on Facebook

Plantar Fasciitis

To start the year off right, I received a request to discuss plantar fasciitis.

Plantar Fasciitis

Plantar Fasciitis

I think some basic anatomy will help explain how this painful injury begins and how it is treated. The plantar fascia is a tendon-like structure (fascia) that runs under the foot supporting the arch. It is an extension of the achilles tendon, which in turn is an extension of the calf tendon. Minor or major tears on this fascia is the fasciitis part of the injury.

The injury is typically caused by tight calves (most athletes experience this), or an overuse/over stretch of the arch in the foot. Improper foot wear, lack of conditioning/stretching, and overuse can be the biggest mechanisms. When I mention improper footwear, I am referring to old running shoes, unsupportive running shoes, and even dress shoes with a hard insole.

The best way to approach foot pain is to deal with it right away. Plantar fasciitis typically causes pain on the medial (inside) part of the heel, right where the arch begins. Stretching your calves can help stop small tears from growing. Checking your footwear at the first sign of pain is critical.

Plantar fasciitis can become quite painful causing difficulty walking, running, and limit activities of daily living. If your foot pain gets to this level seek medical intervention. Getting an x-ray to clear any bony abnormalities and a diagnostic ultrasound to examine the soft tissue is vital.

Therapy is needed to reduce swelling and pain, as well as promote healing to the area. The sooner you seek intervention the less damage you will cause. Some ways you can help at home include:

  • Night splints (socks that keep your fascia on stretch)
  • Compression socks
  • Wearing running shoes in the house
  • Getting out of bed into warm, supportive footwear (to reduce the shock of a cold floor and collapse of the arch)
  • Foot exercises
Night Splint

Night Splint

Strengthening of the foot is important for healing but also as a preventative measure. Athletes take for granted the strength of their feet, which are lifelines for sport. Calf strengthening exercises include the exercises given in my last blog about ankle weakness.


Simple foot exercises include picking up pens with your toes and towel scrunches. In your bare feet scrunch a towel up using just your toes keeping your heel on the floor. Once the pain is manageable and you are no longer limping, the stork stance is very helpful.

Pen pick up

Pen pick up

Towel scrunches

Towel scrunches


You can ice your foot with an old plastic water bottle. Fill the bottle with water and place it in the freezer. Once frozen, roll the bottle under your foot.

Frozen water bottle

Frozen water bottle


If you have any questions or concerns, please contact me. Have a great 2013 and keep those feet happy!!


Jen Mark BSc., CAT(C), CSCS

www.dynamicliving.me
Join us on Facebook

Foot Pain?

I recently had a request for a blog that dealt with feet.  Unstable ankles mostly, which is actually pretty common.

I think the best place to start is with the muscles.  There are some muscles in the foot that originate and insert only in the foot.  But mostly there are tendons from muscles that originate in the lower leg that insert in the foot.  The best way to “strengthen” the foot is to strengthen the muscles in the lower leg.

Straight leg calf raises

Straight leg calf raises


Basic calf raises are the easiest to execute and are great for increasing functional strength in the lower leg.  Every time you take a step you execute a calf raise.  With your legs straight you are targeting your gastroc muscle (the powerful, more visible calf muscle).  You can also do this seated which would target your soleus (the endurance of the calf muscles).  Of course, while standing you are using your body weight (you can hold weights also); while seated, you need to put a weight or plate on your quads to provide resistance.


Calf raises on a step

Calf raises on a step


For further challenge, stand on a step with your feet over the edge so that you can drop your heels below the step and come up from a negative position.  This can be done when you are able to accomplish the above exercises without difficulty.  The muscle fibers here begin on stretch then contract to optimal length, then to a contracted position; therefore, causing more muscle work and fatigue.


Once these exercises are simple enough, you can simply do them on 1 foot.

Stork stance

Stork stance


When ankles are unstable, it generally means the ligaments are having a difficult time keeping your position against gravity.  The stork stance is another simple exercise in theory but many people with ankle injuries have difficulty keeping their balance.  Stand on one leg, and hold for about 15-20 seconds at the beginning.  If you feel that you are losing your balance, it’s better to touch down with your other foot than to wobble around trying to regain your position. To make it more difficult, you can close your eyes (harder than it sounds!).  Past that, you can stand on an unstable surface such as a bosu ball, fit disc, or pillow (keep your eyes open).  Another great way to work your proprioception, is to toss a ball to a wall while in your stork stance.  Mix it up a little and toss to the wall in a different spot each time so that you need to adjust for the dynamic nature of the ball coming back at you.  Again, when losing your balance, touch down with the other foot instead of wobbling around.

These are simple exercises that you can try at home.  If you are having difficulty with the range of motion of your ankles or experience sharp pain with any of the above movements, you need an assessment.  Having strong/stable ankles helps with more activities of daily living than you might think.  Having a strong base will improve movement patterns in your knees, hips, and lower back.  

Let me know what you think!  If you want to request more exercises or have questions about other injuries, please leave a comment.

Jen Mark BSc., CAT(C), CSCS
Athletic Therapist
www.dynamicliving.me
www.facebook.com/dynamiclivingtoronto

All Round Great Core Work!

Side plank while working the glutes - make sure the hip is in extension to ensure activation.

Side plank while working the glutes – make sure the top hip is in extension to ensure activation.

In my last post, I talked about not doing crunches to spare the lumbar spine from unnecessary load.  We talked about other exercises that are great for core stability.

The above picture is another exercise that involves almost the entire body.

To make the exercise more difficult, use your hand instead of elbow on the bottom.

Side Plank

You will be surprised how many people have difficulty even just lifting their leg up while in the side plank.  In time, most people will be able to accomplish this and get more abduction and extension.

Have fun! Enjoy making your core muscles stronger and your pelvis stable!

Let us know if you have tried this and what successes you had.

Jen Mark BSc., CAT(C), CSCS
Athletic Therapist
www.dynamicliving.me

No more crunches!

Ok, we all want rock solid abs, I get it.  And having a strong core is the biggest buzz in the fitness industry – and for good reason.  So why can’t we do crunches anymore?

Remember back in the day those who were working out, were performing sit ups?  This was how fitness lovers and athletes got those abs of steel.  Then science caught up and saw evidence that doing all those sit ups were causing back injuries.  If we look close enough at the mechanics, your hip flexors (iliopsoas group) are doing most of the work and they originate in your lumber spine.  All this excessive pulling on the spine was leading to back injury.  So we all stopped doing sit ups and moved to crunches.

Now science has caught up to crunches.  There is evidence to suggest that doing a crunch can load your spine up to 150 times.  Constantly flexing the spine and overusing one muscle group will never create balance in the body.  Ask me how I feel about machines such as leg curl!!  Our spines are pretty fragile and precious, so we must find another way.  Something that science can’t debunk!

Let’s talk for a second about what your core is and what it’s role is.  Your real “core” includes your deep pelvic muscles (creating a pelvic floor), your transverse abdominis (under your 6 pack muscles), and your multifidus muscles (attaching to each vertebrae in the spine).  The job of these muscles is to stabilize your pelvis, to limit excessive movement.  If your core is strong, you will be able to lift heavier weights, run faster, jump higher etc.  All because your “base” is stable.

There are a few exercises that are needed to get  your core strong.  Keigles are one method for women and men can think about “stopping the flow” (holding in your pee).  If you want to learn about setting your core, visit my website and check out the video.  It’s easier to show that to type!

So once you can activate your core, here are some fun exercises that are commonly done incorrectly.  I typically see poor posture which is a result of a weak or unactivated core.  Most people tend to rush these exercises – remember when doing this type of training, the pelvis should be stable.

The plank on the stabilty ball is a staple exercises – focus on good posture, neutral spine, and hands under your shoulders.  When tucking your knees in, your back does not change and the movement is smooth and controlled.


When using the ab roller, the same principles apply.  Start in a modified plank position and roll forward maintaining your posture and stable pelvis.  Your body should not change position. just your arms stretch out and back in.


One note of caution: Core work should not result in back pain.  It is acceptable to feel that your back is doing some work, but not sharp pain.  If you finish the exercise and you feel discomfort in your back, your pelvis was not stable enough and you need to decrease the difficulty of the exercise.

For questions or comments, please contact me.

Jen Mark BSc., CAT(C), CSCS
Athletic Therapist
www.dynamicliving.me

Christmas Stress and What To Do About It

Raymond Mark Counselling

Enough of the negative wouldn’t you really rather have positive Christmas experiences? Yes, then read on. You have told me about the commercialism, the false aspects of Christmas, the stress and the letdowns.  I agree there are no easy solutions.  However, let me ask you a question.  Wouldn’t you really rather have a “Merry Christmas”? I know that our kids are bombarded by ads, peer pressure and the me-first approach to Christmas.   Ads tell our kids that they need the certain gift in order to be popular.  Hey, I have been through it myself.  Think about it, do you want to give in or are you a fighter: does it really have to be that way?  How about doing it your way!

You and I know that it is possible to experience joy at Christmas.  Give in to the commercial steamroller a little if you want, however don’t let it…

View original post 294 more words

Why we all need shoulder stability

external rotation back view

Back View – notice shoulders are set

A very common problem in the clinic is neck and shoulder pain.  Every type of athlete and avid exerciser will likely experience shoulder pain at some point in their career.  Yet so often at the gym I see shoulder exercises done incorrectly.

Most people do not know that the rotator cuff is an extremely important muscle group and what it’s purpose is.  This shows up in exercise routines as either poorly executed exercises or lack of stability exercises at all.

The rotator cuff is the primary stability for the shoulder.  The muscle group (containing four muscles) holds the humerus into the pocket of the shoulder blade.  Yes, these two bones make up your shoulder! ** side note: if your shoulder blade is winged or dysfunctional you will have shoulder weakness**  If your rotator cuff muscles are not activated, your big traps and deltoids and biceps and triceps and pecs and and and etc have to hold the joint together.  These muscles need to save their energy and strength for moving objects, turning door handles, getting out of bed, sitting in a chair or any number of upper body movements.  With a properly engaged rotator cuff, these muscles will not tire out so quickly leaving you with achy, heavy shoulders or neck pain.

external rotation side view

Side View – notice the elbows are under the shoulders

The muscles in the rotator cuff (infraspinatus, supraspinatus, teres minor, and subscapularis) hold your posture, internally and externally rotate your shoulder, and initiate lifting your arm.  I have pictured the most popular rotator cuff exercise designed to strengthen the external rotation of the shoulder (infraspinatus and teres minor).  Since we spend so long in internal rotation (sitting at a desk or using our smart phones), it’s important to restore this movement.  When our external rotators are as strong as our overworked internal rotators, we are in balance and posture improves.

The external rotation exercise is commonly used with a resistance band.


external rotation front view

Front View – notice the wrists are straight and the elbows have not moved back

The important points to remember are:

  • Keep your posture
  • Keep your elbows touching your sides in the rotation
  • Stay away from letting your shoulders fall forward during any point of the movement
  • Do not squeeze your shoulder blades together

For questions regarding this exercise or other shoulder stability exercises please contact me (jenmark@dynamicliving.me) or visit the videos on our website (video #1).

Jen Mark BSc., CAT(C), CSCS
www.dynamicliving.me

Sensational Split Squats

Probably one of the best lower body exercises is the split squat.

20121103-213438.jpg

Notice in the picture that the front knee is over top the ankle and the back knee has a nice bend to it. The biggest mistake I see is the front knee going way past the toes and creating a difficult angle for the knee, and a lot of stress to get out of the position. Also, I see the back knee often completely straight. This causes strain on that quad leading to a vulnerable position of the hip. The front knee needs to be in line with your second toe when you are squatting. This ensures that the knee is aligned properly and decreases stress to the joint.

In the picture, notice how our athlete’s shoulders are positioned over her hips. Her core is tight and she is not leaning to either side. Her back is neutral allowing her to engage her glutes into action. I often see people leaning forward, which indicates a weak core, or sloppy form.

The most important take home message about the split squat is to ensure that your glutes are engaged. The leg that is out in front is doing the work. The back leg is there simply for balance. Stay planted on your front foot, not allowing yourself to go onto your toes. The back foot will always stay on your toes throughout the exercise. Push up through your front foot, using your glutes and hamstrings. Your quads will work, that’s easy to feel, make sure you pay attention to your posterior muscles. If you are in the correct balance and position, you will not feel an incredible stretch in that back quad.

In the picture you can see our athlete has the weight in one hand (this is the correct hand to carry one weight in). You can also carry a weight in each hand or have a bar across your back. You can increase the stability by placing a BOSU ball under either foot, or both! You can use a medicine ball to lift over your head or twist to the side of the front leg. There are many ways to vary this exercise and make it more exciting and challenging. Mix up the routine so your muscles don’t get used to it.

For more exercise options, book an appointment with one of our personal trainers today.

Jen Mark BSc., CAT(C), CSCS
www.dynamicliving.me
Health and fitness tips follow us on Facebook & Twitter

Stabilize your knees

There are so many people out there that have sore knees.  We get pain in our knees because of chronic use and degeneration as well as acute, sudden injuries.  No matter the reason, the most important rehabilitation is stabilization.  You can begin stabilizing the knees once the swelling and pain is almost gone (if there was any).

Stabilization means that all the muscles that affect the knee are coordinated in working together for control, as well as the ligaments in the knee being strong enough to keep the knee still.  Think of stabilization as guide wires.  As we move about our day, or pivot and twist in a game, we have ligaments and muscles to stop the knee from over rotating or sliding too far forward.  When your knee is unstable, you are in jeopardy of this happening and causing further damage.

An important part of stabilization training is correct technique.  First, when doing any lunging or squatting, your knee needs to stay in line with your second toe (your big toe being the first).  You also must insure that your knee does not go farther than your shoe laces in a forward position.  It is, in fact, your glutes that control the position of your knee.  The bone at the top of the knee joint, the femur, is also the main bone in the hip.  So it would make sense to make sure your glutes are strong and active in order to keep good knee alignment.

Check out the following exercises for knee stability.  Check in with a certified strength coach (or personal trainer) for supervision if needed.  Email me (jenmark@dynamicliving.me)  for any questions or concerns you many have with these exercises.

2 leg squat

1 leg squat

Clam press

2 leg bridge

1 leg bridge

1 leg deadlift

stork stance

foam roll quads

foam roll glutes

foam roll IT Band

Jen Mark BSc., CSCS, CAT(C)
www.dynamicliving.me
@jenkmark
Facebook